Develop, run test deployments, and publish Azure Bicep modules for the Azure Bicep Registry using an Azure DevOps pipeline. This blog post will walk you through testing and deploying Bicep modules in Azure DevOps test environment, ensuring your modules are validated and ready for production. By the end of this guide, you’ll have a clear pipeline for Bicep module development, ensuring smooth deployment and future scalability.

1. What Are Azure Bicep Modules?
Azure Bicep is a domain-specific language (DSL) for deploying Azure resources declaratively. Bicep simplifies the process of defining your Azure infrastructure as code (IaC). A Bicep module is essentially a reusable piece of Bicep code that can be shared, versioned, and deployed independently.
With Azure Bicep Registry, you can publish your Bicep modules for reuse across different environments, projects, or teams, enhancing your DevOps pipeline and creating scalable infrastructure-as-code solutions.
2. Prerequisites for Developing and Testing Bicep Modules using test deployments
Before you start developing and testing your Bicep modules, ensure you have the following:
- Azure Subscription: A development/sandbox subscription where resources can be deployed for testing.
- Azure Bicep Registry: This will store your modules once they are validated and ready for production.
- Azure DevOps: The main platform to run the CI/CD pipeline for testing and deploying your Bicep modules.
- Service Connection: An Azure DevOps service connection with the right permissions to your Azure subscription where you will be deploying your test resources.
3. Step-by-Step Guide: Creating and Testing Bicep Modules in a Single Repository
When managing multiple Bicep modules in a single shared repository, it’s crucial to establish an efficient structure and process. Here’s the best approach:
Repository Structure:
Organize Bicep modules in separate subfolders:
/modules
    /storageAccount
        - your-module-name.bicep
        - metadata.json
        /tests
            - main.bicep (for test deployment referencing parent module file)
            - main.bicepparam (for test deployment)
/keyVault
    - module-name.bicep
    - metadata.json
    /tests
        - main.bicep
        - main.bicepparam
/sqlServer
    - module-name.bicep
    - metadata.json
    /tests
        - main.bicep
        - main.bicepparam
/scripts
    - generateBicepReadme.ps1 # Script for generating README.md files from module metadata
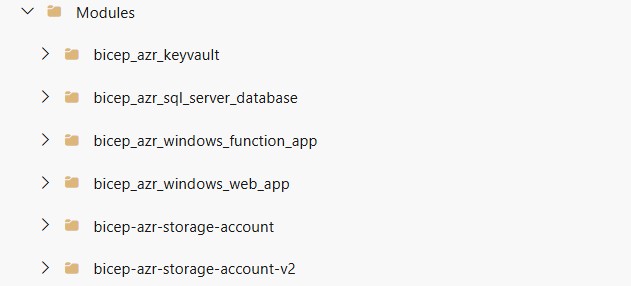
Repository Structure Example:

File Descriptions:
module-name.bicep: The core Bicep file defining the module’s resources.metadata.json: Contains metadata likeitemDisplayName,description, andsummary, used bygenerateBicepReadme.ps1to auto-generate documentation.testssubfolder: Containsmain.bicepandmain.bicepparamfiles for test deployments, referencing the parent module for isolated testing.generateBicepReadme.ps1: Authored by Tao Yang, this PowerShell script automates README.md file generation for each Bicep module using metadata frommetadata.json. It leverages PSDocs (developed by Microsoft’s Bernie White, known for PSRules) to convertmodule-name>.bicepfiles into ARM templates for documentation purposes, ensuring standardized documentation.
Example of metadata.json:
{
  "itemDisplayName": "Azure Storage Account Deployment Template",
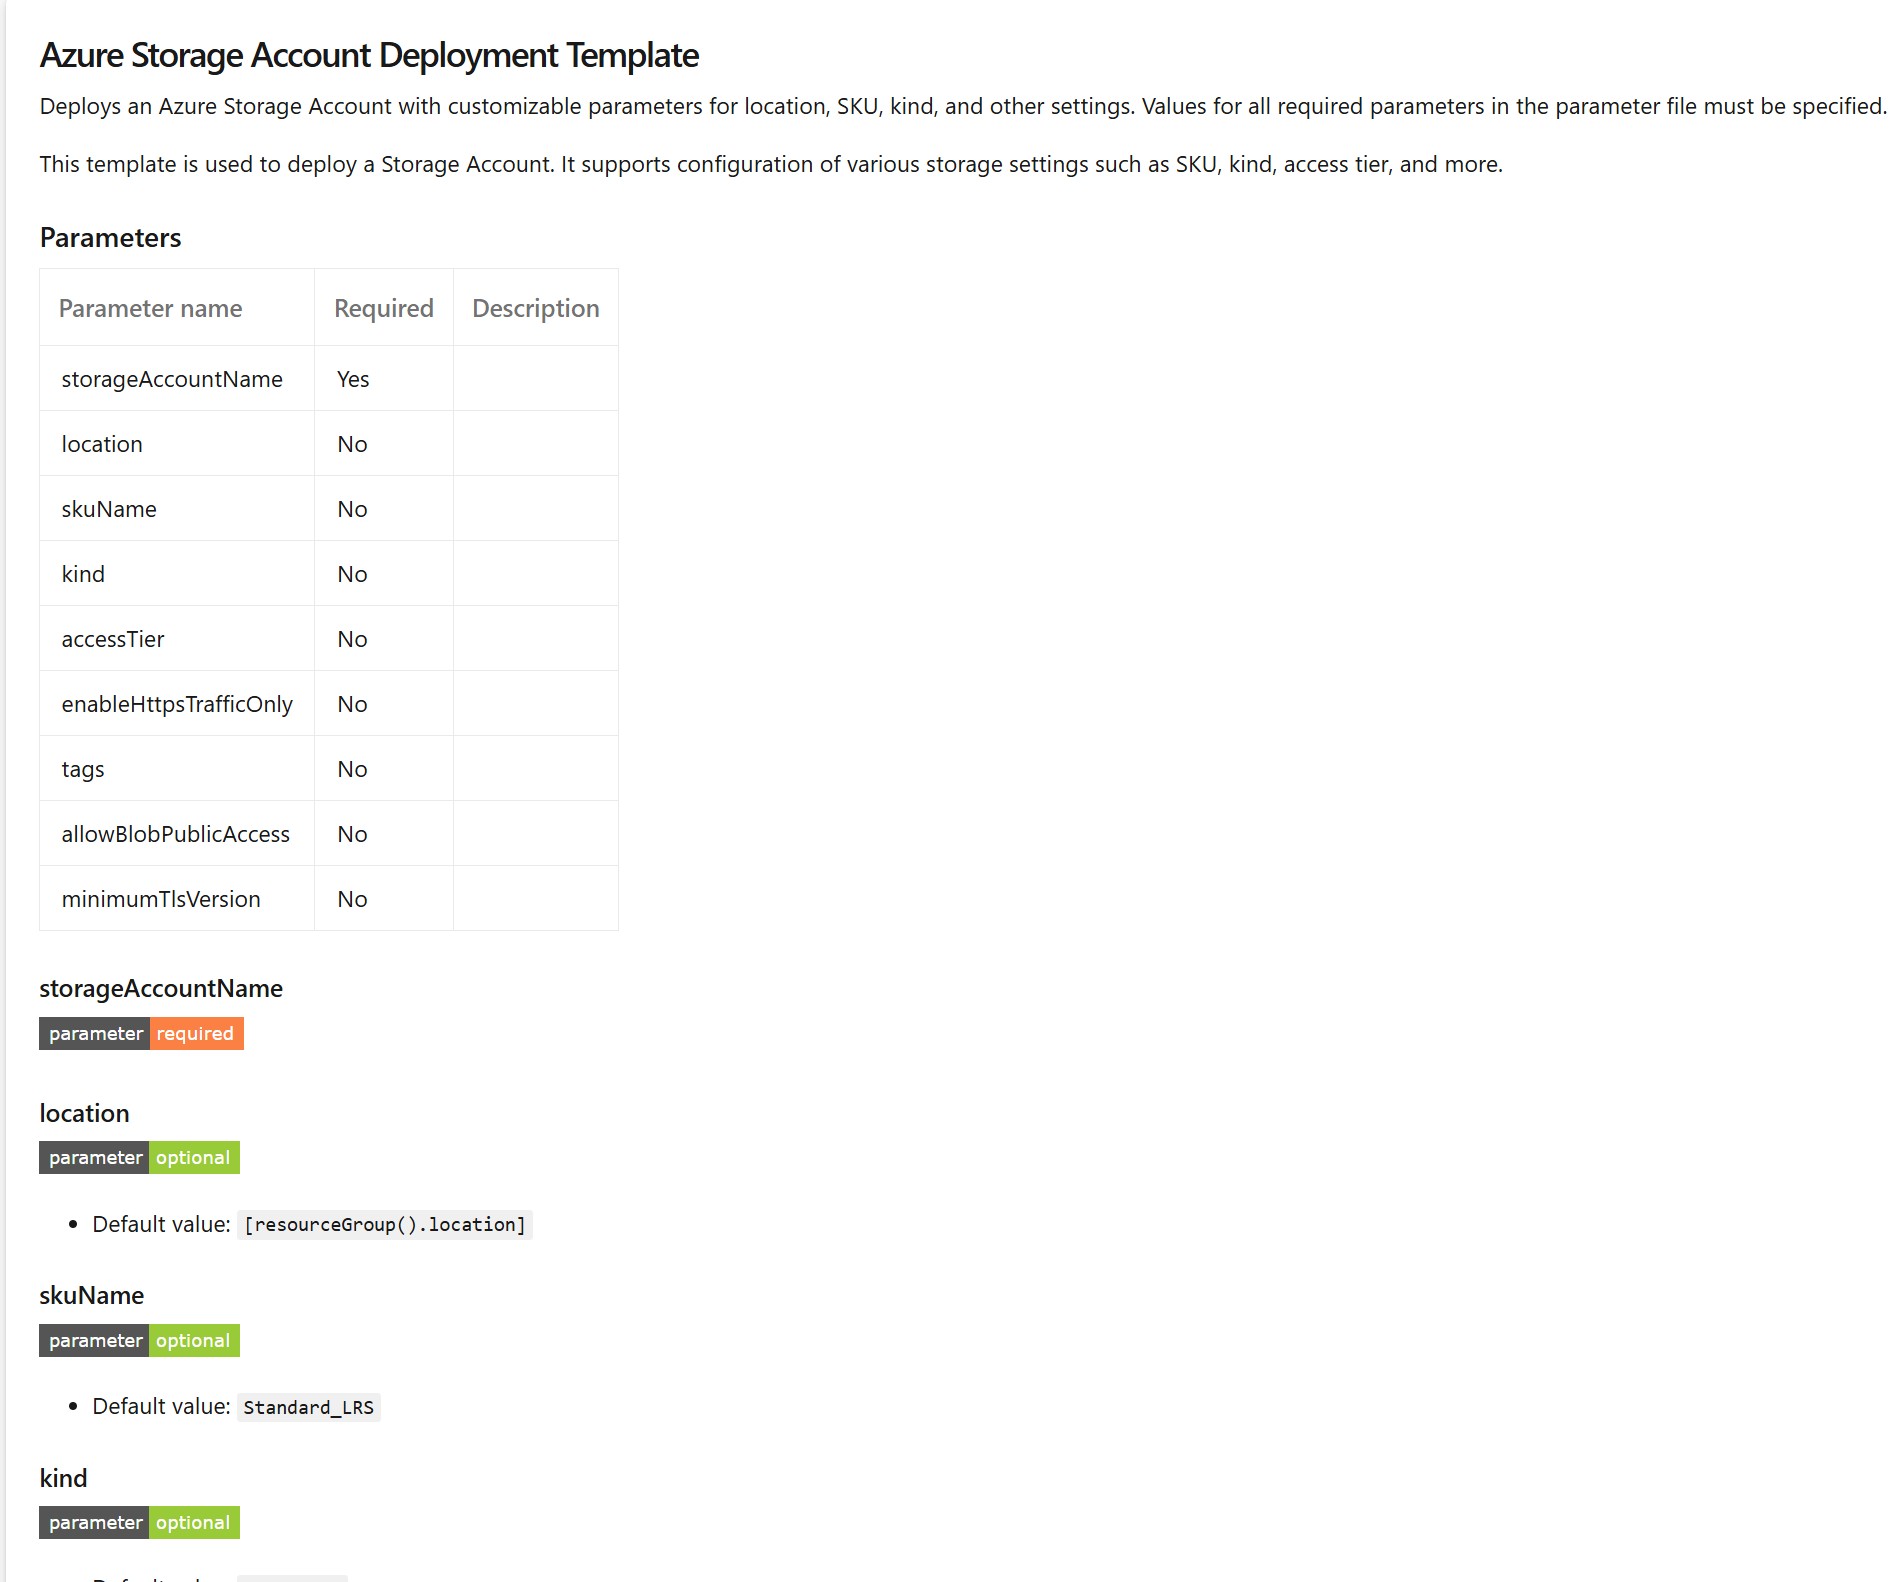
  "description": "This template is used to deploy a Storage Account. It supports configuration of various storage settings such as SKU, kind, access tier, and more.",
  "summary": "Deploys an Azure Storage Account with customizable parameters for location, SKU, kind, and other settings. Values for all required parameters in the parameter file must be specified."
}
4. Implementing the Azure DevOps Pipeline with Validation and Test Deployment
With your repository structured, here’s how to build a robust Azure DevOps pipeline to validate, deploy, and test your Bicep modules.
Azure DevOps Pipeline Breakdown:
- Manual Trigger: The pipeline is manually triggered via the Azure DevOps UI.
- What-If Preview Stage: Simulates deployment and provides a preview of changes without modifying resources.
- Deployment Stage: Deploys the selected module.
- Post-Deployment Validation: Verifies resources are correctly deployed, followed by cleanup.
- README Generation: Uses PSDocs to automatically generate a README.md file for each module.
YAML Pipeline:
name: 'Bicep_Modules_Test_$(Build.SourceBranchName)_$(Year:yyyy).$(Month).$(DayOfMonth)$(Rev:.r)'
trigger: none # Manual trigger for controlled publishing
parameters:
- name: moduleName
displayName: "Bicep Module to Test"
type: string
values:
- bicep-azr-storage-account
- any-other-module
variables:
azureSubscription: your_service_connection # Azure service connection for deployment
resourceGroup: your_resource_group # Resource group to deploy test resources
location: your_location # Location for resources.
bicepFile: "$(Build.SourcesDirectory)/Modules/${{ parameters.moduleName }}.bicep"
paramFile: "$(Build.SourcesDirectory)/Modules/${{ parameters.moduleName }}/tests/main.bicepparam"
stages:
- stage: WhatIfTestDeployment
displayName: 'What-If Bicep Test Deployment'
jobs:
- job: WhatIfSimulation
displayName: 'Simulate Bicep Deployment with What-If'
pool:
vmImage: 'windows-latest'
steps:
- checkout: self
- task: AzurePowerShell@5
displayName: "What-If Analysis"
env:
RETIRE_AZURERM_POWERSHELL_MODULE: true
inputs:
azureSubscription: $(azureSubscription)
scriptType: "InlineScript"
azurePowerShellVersion: "LatestVersion"
pwsh: true
inline: |
$timestamp = Get-Date -Format "yyyyMMddHHmmss"
$deploymentName = "What-If-deploy-resources-$timestamp"
Write-Output "What-If Deployment Name: $deploymentName"
$WhatIfDeployment = New-AzResourceGroupDeployment -Mode Incremental `
-Name $deploymentName -ResourceGroupName $(resourceGroup) `
-TemplateFile $(bicepFile) `
-TemplateParameterFile $(paramFile) -WhatIf
Write-Output "What-If Analysis for Deployment operation successfully executed."
# Check provisioning state
$provisioningState = $WhatIfDeployment.ProvisioningState
if ($null -eq $provisioningState) {
Write-Output "Provisioning State: Not available"
} else {
Write-Output "Provisioning State: $provisioningState"
if ($provisioningState -eq 'Succeeded') {
Write-Output "Provisioning succeeded."
} else {
Write-Output "Provisioning state: $provisioningState"
}
}
- stage: DeployBicepTestModule
displayName: 'Deploy Bicep Test Module'
dependsOn: WhatIfTestDeployment
jobs:
- job: DeployTestModule
displayName: 'Deploy and Test Selected Bicep Test Module'
pool:
vmImage: 'windows-latest'
steps:
- checkout: self
- task: AzurePowerShell@5
displayName: "Resource Deployment"
env:
RETIRE_AZURERM_POWERSHELL_MODULE: true
inputs:
azureSubscription: $(azureSubscription)
scriptType: "InlineScript"
azurePowerShellVersion: "LatestVersion"
pwsh: true
inline: |
$timestamp = Get-Date -Format "yyyyMMddHHmmss"
$deploymentName = "deploy-resources-$timestamp"
Write-Output "Deployment Name: $deploymentName"
$Deployment = New-AzResourceGroupDeployment -Mode Incremental `
-Name $deploymentName -ResourceGroupName $(resourceGroup) `
-TemplateFile $(bicepFile) `
-TemplateParameterFile $(paramFile)
Write-Output "Resource Deployment successfully executed."
# Check provisioning state
$provisioningState = $Deployment.ProvisioningState
if ($null -eq $provisioningState) {
Write-Output "Provisioning State: Not available"
} else {
Write-Output "Provisioning State: $provisioningState"
if ($provisioningState -eq 'Succeeded') {
Write-Output "Provisioning succeeded."
} else {
Write-Output "Provisioning state: $provisioningState"
}
}
- script: |
Write-Host "Running post-deployment validation for test module: $(moduleName)"
# Placeholder for specific validation checks on deployed resources
# Example: Validate resource properties, existence, etc.
displayName: 'Post-Deployment Validation'
# Destroy test resources after validation
- task: AzurePowerShell@5
inputs:
azureSubscription: '$(serviceConnectionName)'
ScriptType: 'InlineScript'
Inline: |
$resourceGroup = "$(resourceGroup)"
Write-Host "Deleting all resources within resource group: $resourceGroup"
# Get all resources in the specified resource group
$resources = Get-AzResource -ResourceGroupName $resourceGroup
# Delete each resource in the resource group
foreach ($resource in $resources) {
Write-Host "Deleting resource: $($resource.Name)"
Remove-AzResource -ResourceId $resource.ResourceId -Force -ErrorAction Stop
}
Write-Host "All resources in resource group $resourceGroup have been deleted."
displayName: 'Destroy Test Resources After Validation'
# Generate README Documentation
- task: AzurePowerShell@5
displayName: "Generate README Documentation and Push to Repository"
env:
RETIRE_AZURERM_POWERSHELL_MODULE: true
moduleName: $(moduleName)
SYSTEM_ACCESSTOKEN: $(System.AccessToken)
inputs:
azureSubscription: $(azureSubscription)
scriptType: "InlineScript"
azurePowerShellVersion: "LatestVersion"
pwsh: true
inline: |
[Net.ServicePointManager]::SecurityProtocol = [Net.SecurityProtocolType]::Tls12
# Validate environment
if (-not $env:SYSTEM_ACCESSTOKEN) {
Write-Error "System Access Token is not available. Ensure the pipeline has the correct permissions."
exit 1
}
# Install PSDocs modules if not installed
if (-not (Get-Module -ListAvailable -Name PSDocs)) {
Write-Output "Installing PSDocs module..."
Install-Module -Name PSDocs -Scope CurrentUser -Force -AllowClobber
}
if (-not (Get-Module -ListAvailable -Name PSDocs.Azure)) {
Write-Output "Installing PSDocs.Azure module..."
Install-Module -Name PSDocs.Azure -Scope CurrentUser -Force -AllowClobber
}
# Validate module name
$moduleName = $env:moduleName.Trim('"')
if (-not $moduleName -or $moduleName -eq '') {
Write-Error "Module name is not defined. Ensure it is passed as an environment variable."
exit 1
}
# Paths
$modulePath = Join-Path -Path "$(Build.SourcesDirectory)" -ChildPath "Modules/$moduleName"
$scriptPath = Join-Path -Path "$(Build.SourcesDirectory)" -ChildPath "Scripts/generateBicepReadme.ps1"
$bicepFile = Get-ChildItem -Path $modulePath -Filter "*.bicep" -File | Select-Object -First 1
if (-not $bicepFile) {
Write-Error "No Bicep file found in $modulePath."
exit 1
}
$bicepFilePath = $bicepFile.FullName
# Run README generation script
Write-Output "Generating README.md..."
try {
. $scriptPath -templatePath $bicepFilePath
Write-Output "README.md successfully generated."
} catch {
Write-Error "Failed to generate README.md: $_"
exit 1
}
# Validate README.md
$readmePath = Join-Path -Path $modulePath -ChildPath "README.md"
if (-not (Test-Path -Path $readmePath)) {
Write-Error "README.md not found at $readmePath."
exit 1
}
# Configure Git for current repository
git -C "$(Build.SourcesDirectory)" config user.email "This email address is being protected from spambots. You need JavaScript enabled to view it. "
git -C "$(Build.SourcesDirectory)" config user.name "Azure DevOps Agent"
# Update remote URL for Git
$repositoryUri = $env:BUILD_REPOSITORY_URI -replace "https://[^@]+@", "https://"
$remoteUrl = $repositoryUri -replace "https://", "https://$env:SYSTEM_ACCESSTOKEN@"
git remote set-url origin $remoteUrl
# Push changes
git add "$readmePath"
git commit -m "Update README.md for module: $moduleName" || Write-Output "No changes to commit."
try {
git push origin HEAD:$(Build.SourceBranch)
Write-Output "README.md successfully pushed to branch $(Build.SourceBranch)."
} catch {
Write-Error "Failed to push changes: $_"
exit 1
}
Detailed Pipeline Features and Benefits:
- Manual Trigger: This approach prevents unintended changes, giving developers full control.
- What-If Preview: The
-WhatIfparameter provides a safe way to preview changes before applying them. - Deployment Stage: Ensures consistent deployments with
.bicepparamfor parameter management. - Post-Deployment Cleanup: Cleans up resources to maintain a clean testing environment.
- README Generation: Keeps documentation up-to-date with automated generation using
generateBicepReadme.ps1.
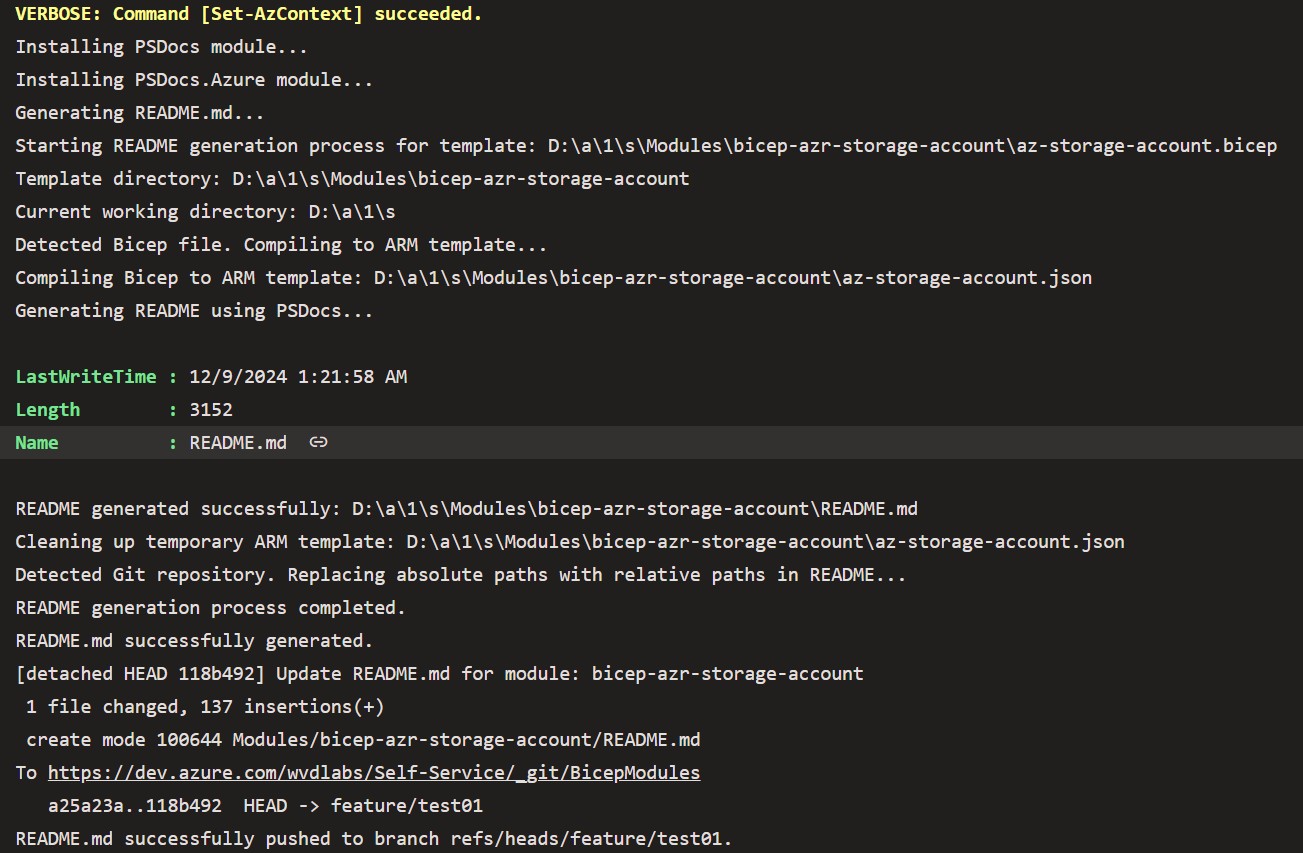
Generate readme pipeline run result

Generated readme.md documentation file example

5. Versioning Bicep Modules for Publishing
When working with Azure Bicep modules, versioning is critical for managing updates, ensuring traceability, and supporting reuse in multiple environments. Each module should embed a version directly in its Bicep file, which is used during publishing to the Azure Bicep Registry.
Key Steps for Versioning
- Include Version Metadata: Add a version to the
@metadatablock of the module. This version should be incremented with every change to ensure traceability. - Use a Prefix for Organization: Incorporate a prefix, such as
bicep/, when publishing to the registry to differentiate Bicep modules from other artifacts.
Sample Versioned Block
@description('Version of the Bicep module')
@metadata({ version: '1.0.0' })

resource storageAccount 'Microsoft.Storage/storageAccounts@2023-01-01' = {
  name: 'mystorageaccount'
  location: resourceGroup().location
  sku: {
    name: 'Standard_LRS'
  }
  kind: 'StorageV2'
  properties: {}
}

output moduleVersion string = version
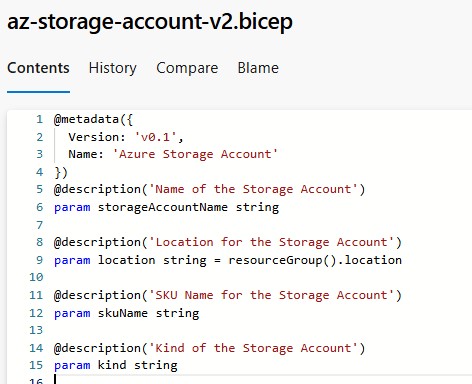
Sample Versioned Block another example

6. Publishing Modules to Azure Bicep Registry
Once your Bicep module has been validated and successfully passed all tests, you can publish it to the Azure Bicep Registry. The following Azure DevOps pipeline automates the publishing process with these key features:
-
Manual Trigger
- Ensures controlled publishing by allowing manual execution, ensuring readiness before deployment.
-
Version Validation
- Verifies the presence of version metadata in your Bicep module.
- If metadata is missing, the pipeline generates warnings and skips the affected modules without causing pipeline failure, ensuring uninterrupted execution.
-
Prefix Management
- Automatically applies a
modules/bicep/prefix to all module names in the registry for consistent organization.
- Automatically applies a
-
Conditional Publishing
- Prevents overwriting of existing versions in the registry by checking for their presence before publishing.
This pipeline provides a reliable and efficient method for managing and publishing your Bicep modules while minimizing errors and maintaining version integrity.
Publishing Pipeline:
name: 'Bicep_Modules_Publish_$(Build.SourceBranchName)_$(Year:yyyy).$(Month).$(DayOfMonth)$(Rev:.r)'
# Manually triggered via DevOps portal
trigger: none

variables:
  serviceConnection: "test01"
  bicepRegistry: "depocacr01.azurecr.io"
  modulePrefix: "modules/bicep/"

pool:
  vmImage: "windows-latest"

stages:
  - stage: Publish_Modules
    jobs:
      - job: Publish
        steps:
          - checkout: self

          - task: AzureCLI@2
            displayName: "Publish Bicep Modules to ACR"
            inputs:
              azureSubscription: $(serviceConnection)
              scriptType: "pscore"
              scriptLocation: "inlineScript"
              inlineScript: |
                # Ensure the Bicep CLI is set up
                az config set bicep.use_binary_from_path=true --only-show-errors
                az bicep install --only-show-errors

                # Define paths and variables
                $modulesPath = "$(Pipeline.Workspace)/s/Modules"
                $bicepRegistry = "$(bicepRegistry)"
                $modulePrefix = "$(modulePrefix)"

                if (-not (Test-Path "$modulesPath")) {
                    Write-Output "Modules directory not found at $modulesPath. Exiting."
                    exit 1
                }

                Write-Output "Modules directory found at $modulesPath."
                Write-Output "Fetching list of published modules from ACR..."

                # Fetch existing modules in the registry
                $publishedModules = $(az acr repository list --name $bicepRegistry --query "[?contains(@, '$modulePrefix')]" -o tsv --only-show-errors 2>$null)

                # Iterate through each Bicep file in the Modules directory
                Get-ChildItem -Recurse -Path "$modulesPath" -Filter *.bicep | Where-Object {
                    -not ($_.FullName -like "*\tests\*") # Exclude test modules
                } | ForEach-Object {
                    $fileName = $_.BaseName
                    $bicepFilePath = $_.FullName

                    Write-Output "Processing module: $fileName ($bicepFilePath)"

                    # Read the Bicep file to extract version metadata
                    $bicepContent = Get-Content -Path $bicepFilePath -Raw
                    if ($bicepContent -match '@metadata\({\s*Version:\s*''([^'']+)''') {
                        $moduleVersion = $matches[1]
                        Write-Output "Found version metadata: $moduleVersion for module $fileName"
                    } else {
                        Write-Output "No version metadata found in $fileName. Skipping."
                        return
                    }

                    # Check if the module already exists in the registry
                    if ($publishedModules -contains "$modulePrefix$fileName") {
                        Write-Output "Module $fileName already exists in the registry. Checking tags..."

                        # Fetch tags for the existing module
                        $existingTags = az acr repository show-tags --name $bicepRegistry --repository "$modulePrefix$fileName" --query "[]" -o tsv --only-show-errors 2>$null

                        if ($existingTags -contains $moduleVersion) {
                            Write-Output "Module $fileName version $moduleVersion already exists in the registry. Skipping."
                        } else {
                            Write-Output "Publishing new version $moduleVersion for module $fileName..."
                            az bicep publish --file $bicepFilePath --target br:$bicepRegistry/$modulePrefix${fileName}:$moduleVersion --only-show-errors 2>$null
                        }
                    } else {
                        Write-Output "Module $fileName not found in registry. Publishing..."
                        az bicep publish --file $bicepFilePath --target br:$bicepRegistry/$modulePrefix${fileName}:$moduleVersion --only-show-errors 2>$null
                    }
                }
                Write-Output "Generating a list of available modules and versions in the registry..."
                $items = @()
                $(az acr repository list --name $(bicepRegistry) --query "[?contains(@, '$(modulePrefix)')]" -o tsv --only-show-errors 2>$null) | ForEach-Object {
                    $tags = $(az acr repository show-tags --name $(bicepRegistry) --repository $_ -o tsv --only-show-errors 2>$null)
                    $items += [PSCustomObject]@{
                        Module = $_
                        Tags = $tags -join ", "
                    }
                }
                Write-Output $items | Format-Table -AutoSize
Explanation of Steps
-
Version Check
- The pipeline reads the version information from the
@metadatablock in each Bicep module. - If no version metadata is found, publishing for that module is skipped by default to avoid ambiguities.
- Optional: The pipeline can be configured to generate a fallback version (e.g., based on the current date such as
2024-11-25) if required, enabling flexibility for modules without metadata.
- The pipeline reads the version information from the
-
Prefix Management
- To ensure consistent organization in the registry, all modules are prefixed with
bicep/. - This helps in logically grouping and easily identifying modules within the Azure Bicep Registry.
- To ensure consistent organization in the registry, all modules are prefixed with
-
Conditional Publishing
- Before publishing a module, the pipeline checks the registry for existing versions.
- If the version already exists, the module is skipped to prevent accidental overwrites and maintain version integrity.
-
Error Handling
- Warnings are logged for any skipped modules due to missing metadata or existing versions.
- The pipeline continues to run uninterrupted, providing clear feedback on issues encountered.
This approach ensures efficient publishing while offering optional fallback configurations for additional flexibility.
More detailed blog post on how Azure Bicep Publishing process works, can be found by following this link.
7. Conclusion
By implementing this process, you can automate the validation and publication of Azure Bicep modules, ensuring:
- Scalability: A structured repository and namespace (
bicep/) support growth as new modules are added. - Traceability: Versioning ensures every change is tracked and reproducible.
- Efficiency: Automated pipelines reduce manual effort and errors.
With this setup, you’re not just publishing modules—you’re building a scalable, reusable, and future-proof ecosystem for managing infrastructure as code with Bicep.Do you have unique approaches to managing Bicep modules? Share your thoughts in the comments!


